Wednesday, September 11, 2013

Snickerdoodle Cut Out Cookies

Fall is just around the corner, it's a little difficult to tell today with the temperature soaring to almost 90 degrees here in Seattle!
But the signs are popping up everywhere else. I think a lot of us really get the first taste of fall when Starbucks reintroduces the pumpkin spice back into their lineup! I know I found myself digging in the back of the closet for my scarves and I even dropped my favorite jackets off to get dry cleaned the day after I saw the sign :)

Fall makes me think about warm clothes, warm drinks and warm spices! And it makes me think of that delicious smell of baking and spices filling the house. Apple pie, apple cider, warm gooey cinnamon rolls or maybe just a hot cup of spiced chai. All of those yummy things have at least one thing in common; cinnamon! For me, cinnamon, is the quintessential fall spice.

If you follow me on facebook, or instagram or really anywhere else, you already know that I am madly in love with baking, especially cookies! I also LOVE fall! Like, love, love fall. I have several boards dedicated to my love of all things fall. I am convinced there is nothing better than baking cookies on a beautiful fall day in the pacific northwest (with the football game on of course)!

This week, I got to thinking about how I never make drop cookies anymore. I am always so busy making my decorated cookies that I don't have much time for anything else, so I decided it would be fun to turn some of my favorite drop cookies into roll out cookies! And what could be better on a fall day than a nice snickerdoodle? You really can't go wrong, it's soft, warm, tender and most importantly has a mellow sweetness and a little cinnamon kick!

I honestly didn't try very hard with these cookies, I took my basic cookie recipe (I know, it needs to be updated desperately) and left out the vanilla bean and added a little cinnamon. I use Vietnamese cinnamon and I am telling you, if you have never tried it, it's cinnamon x10! Just opening the jar smells like walking into Cinnabon! It's the best cinnamon I've ever tried :)

Just look at that gorgeous dough, you can see those beautiful, warm flecks of cinnamon!


I loved the way the dough smelled as the sugar and butter and cinnamon blended together! Just heavenly!


The best part is that all the flavor of the cinnamon is baked right into the cookie and the extra little sprinkles of sugar and cinnamon just melt right into your mouth.

You can eat these beauties right out of the oven and they are already a perfect treat! But the little sprinkling of sugar does not interfere with decorating at all, so you can dress them up anyway you like!

I chose to go super easy with this batch and gave them a few quick details.


Aren't they gorgeous?!? And incredibly yummy!

If you're looking for a great new recipe for cut out cookies, that will be perfect for fall, look no further!

Snickerdoodle Cut Out Cookies

Ingredients:

  • 1 cup butter, cold
  • 1 cup granulated sugar
  • 1 egg
  • 1 tsp vanilla extract
  • 1 tsp cinnamon (this is my favorite
  • 3-3 1/2 cups flour
  • 1 tsp baking powder
  • 1/4 tsp salt

additional tsp cinnamon and 1/4 cup of sugar for dipping

Directions:

  1. Cut cold butter into chunks, combine in mixer with sugar and cinnamon until fluffy (about 1 minute).
  2. Add egg and vanilla extract, beat until fully incorporated.
  3. Here, I like to scrape down the bowl and then just measure and scoop all the flour directly into the mixing bowl, add the salt and baking powder and mix on low speed until all the dry ingredients are incorporated. This will only take about a minute and the dough will form a ball on the beater and pull away from the sides of the bowl.
  4. Roll dough out onto a lightly floured surface and use your favorite cutters to cut out shapes.
  5. Roll the edges of the cookie in the sugar and cinnamon mixture and then lay the top side down into the mixture. 
  6. Line your baking sheets with parchment for even baking (and easy cleanup) and place cookies onto sheets.
  7. Place baking sheets into the freezer for about 10 minutes while the oven heats to 350 degrees.
  8. Bake cookies for about 10-12 minutes depending on your oven.
  9. Allow cookies to cool completely before decorating or just enough to eat without burning your mouth :)

If you're looking for some other fall perfect cut out cookie recipes try these:


Happy fall and happy baking friends!


Samantha
Flour De Lis

Wednesday, October 31, 2012

Time to say THANK YOU!

Recently, my very good friend Melissa from The Baked Equation hit 3000 fans on facebook. In a magical twist of cookie fate, I hit 3000 on the same day! We decided the only thing to do under such circumstances was to have a big, fat, cookie-cakey giveaway! We rounded up some great gifts! All items that we love and asked some of our favorite companies to join in and share some more wonderful goodies!

When I first started this sweet baking journey, I found Bridget, of Bake at 350 and I knew that cookies and I were meant to be together forever!
I have always loved to bake and did plenty of that, but Bridget's blog was the inspiration I had been looking for without even knowing it! I made my very first cookies for Christmas 2010 and never stopped!
Melissa, was also inspired by Bridget when she stumbled upon the great tutorials at University of Cookie! And since Bridget's new book just hit the shelves, we couldn't think of a better gift to give our fans! We'll be sending the winners a personalized, autographed copy of Bridget's new book, Decorating Cookies!

But we didn't stop there! I know, you're thinking "you could have. That's enough for me!" Of course, you're right! This book is 160 pages of cookie awesomeness! But sometimes awesome things come with other awesome things!


If you read Bridget's blog, you probably already know who Teresa of Blooming on Bainbridge is. But you may not know that she is my sweet neighbor across the pond! And you may not know that she is opening her very own shop this coming spring Bags by Bloom! She makes incredibly adorable goodies and has offered up 2 medium size cosmetic bags for you!


If you makes cookies, you NEED cookie cutters!! So how about a $25 gift card to one of our very favorite cookie cutter companies, Coppergifts.com! Beth and Ray and the Coppergifts team make great quality cookie cutters in every designs you could want!
And you'll want to look super dapper when you show off all your cookie skills, so you'll need a new t-shirt from Captain Leisure Tees!

These guys are awesome! I have three of their shirts already and LOVE them!  You may not know that I sent them the idea for the "I bake, what's your superpower" tee! They did a great job of designing it and now everyone can get one! You can always add it to your Christmas wish list if you don't win!


You'll also receive a cute heart sugar cookie necklace from Sweet Cherry Shop!


Pretty much the most adorable cookie swag ever! I received one as a wedding gift from a very sweet cookie friend of mine! With matching earrings! Stevie is as sweet as pie and she's just a quick drive away! Yep! Right here in WA! I love having so many local crafty friends!

 And how about some cute custom labels from The Favor Box! These add such a wonderful touch to packaging! I received mine a few weeks ago, if you follow me on Instagram, you've already seen the awesomeness!

With a multitude of great designs and awesome colors, the only hard part will be choosing just one!

We all know that cookie making/cake decorating is a full time job! Right?! So you won't have time to be polishing the water marks on your coffee table! So a set of these adorable owl coasters from Janet Arizona should keep you trendy and save you some elbow grease!

Owls are just about the cutest things on the planet! And these cute coaster would also be a great stocking stuffer in you're feeling generous and decide to share your winnings!

I may have already mentioned 5 or 20 times that I live in Seattle and if you automatically associate rain with Seattle then you'll understand why I love, love, love this next gift! I received these custom monogramed rain boots from Crystal Faye! She just launched her new website with adorable home decor and very stylish gifts perfect for everyone!

Melissa sent me these gorgeous boots as a wedding gift! I died! And I cried. And then I wore them around the living room and then I vacuumed so the boy wouldn't know that I wore them in the house! And then I realized that they had never been worn, so I didn't need to vacuum to hide my guilt! So I wore them again, around the living room and maybe to bed...

If you live in a area that gets a lot of rain, or you just like the super fashionable look of riding boots meets rain boots, then you will swoon for these!

Finally, if you are working yourself to the bone, then maybe it's time for a little pampering! How about some awesome new hair care products from Dollyrockers Salon! If you have straight hair like me, you'll love their straight collection! You'll win a bottle of Primp & Prime, Straight Laced and Shine Struck! And if you're local to AZ, you can use these coupons for any salon service!


Just print them off and take them with you!


And Melissa and I both shop at World Market and always find something fun! So she picked up a little collection of goodies just for you!


It's a lot to take in! I know.

Melissa and I are both so thankful to be doing what we love and having so many of you go on this journey with us! Thank you for an amazing year so far!

This giveaway is going to run from Today, October 31st, 2012 until November 7th, 2012. That's one week for you to enter and send you friends so they can enter and share the loot with you if they win ;)

Melissa is doing the same giveway over on her blog! So if you are paying attention, that mean TWO lucky people will each win all of this great stuff! Yep! You get two chances to win! Enter here, and enter there! And share! The more the merrier right ;)

Each selection through the rafflecopter widget earns you an entry! Good luck!


a Rafflecopter giveaway

Well we have a winner! Thank you all so much for entering and sharing and for continuing to follow us on this awesome journey!
Brenda W. is one winner! And has been contacted by email! Make sure you check out The Baked Equation's giveaway to see who the other winner is!
Congratulations Brenda!


Samantha
Flour De Lis

Wednesday, October 24, 2012

Creative Cutters: Round One


A while back, I asked a few of my sweet cookie friends to get creative with a certain cutter. We did it just for fun. And I guess for a little challenge. We all like a little challenge and a little competition right?

I chose a cutter I had never used before, not even for it's REAL purpose. It's now one of my favorite cookie cutters!! When I first pulled it out of the box and looked at it, I had no idea what I was going to make and I KNOW that the girls who joined in on the fun felt the same way!
And yet we all came up with some pretty unique ideas. All different!

I am hoping I can convince them that it was so much fun that they will all want to do it again :)

This is the cutter we chose for Crazy Cutters: Round One. It's a simple baseball glove. And it's actually not the one pictured. We all go our cutter from The Cookie Cutter Company, but it has cute little scallops on the bottom where the stitches go, you can tell from the pictures of the cookies that it's a little different.

The Cookie Cutter Company is one of my favorite places to shop! They have an AMAZING selection, best prices and GREAT customer service! Seriously, have you talked to them?!? Just the nicest crew around.
Anyway, before I get too far off topic I want to introduce you to my cookie friends and my fellow creative cutters!

First up is my dear friend Trinette of Trinnie Loves Cookies. Trinette bakes from the great state of California ( I was born there!) and she makes some of the cutest cookies ever!
Are you as jealous as I am, looking at that awesome mixer family?! I have serious Kitchenaid envy and am thinking I need a new addition (my husband does NOT agree!)
If you haven't met Trinnie yet, pop over to her FB page and say hello! She's a doll and one of the nicest people I know! 

Next up is Christina of Sweet C's Bake Shop. She has the cutest little boys I've EVER laid eyes on! 


Which also has me thinking I need a new addition ;) (and again, my husband DOES NOT agree). LOL
Christina bakes up beautiful cookies and some crazy delicious candied nuts! She's wicked funny and so sweet I just want to move next-door so we can be neighbors (and so I can eat her delicious confections!)

My next co-cookie crafter is Melissa from The Baked Equation. Melissa and I met over a box of Chocolate. She read my post all about my favorite cocoa and sent me some of her favorite to try! 
Doesn't she have a great left hand? It can be challenging to post photos of your favorite bakers (secretly) when they don't have any up!

I am telling you, the nicest people in the whole world make cookies! And cakes and cupcakes and brownies and beautiful sugar flowers! Melissa does all of that! Seriously, I wouldn't joke about that! She really is the nicest gal around! And she's trying to help me convince my husband that I need a bakers rack! That's how you know she's a good friend ;)


And rounding off the list of this rounds creative cookiers is Hayley from Bee Sweet Confections! Here she is at home in the wild! Hayley and I share a deep love for primates! One of these days if we both disappear from FB and stop answering our emails we'll probably be in Indonesia working with orangutans! Until then, cookies!


Another California girl! Those Beach Boys really knew what they were talking about! Hayley makes AMAZING cookies. I kinda think she has a secret cookie making super power! So far, I haven't been able to get her to admit it. If you look through her work, I am convinced you'll think she has super powers too and if enough of us believe it, it has to be true ;)

Okay, enough about us! I am sure you are ready to see these cookies! Here they are! Can you guess by looking at the collage which cookie belongs to the cookier?


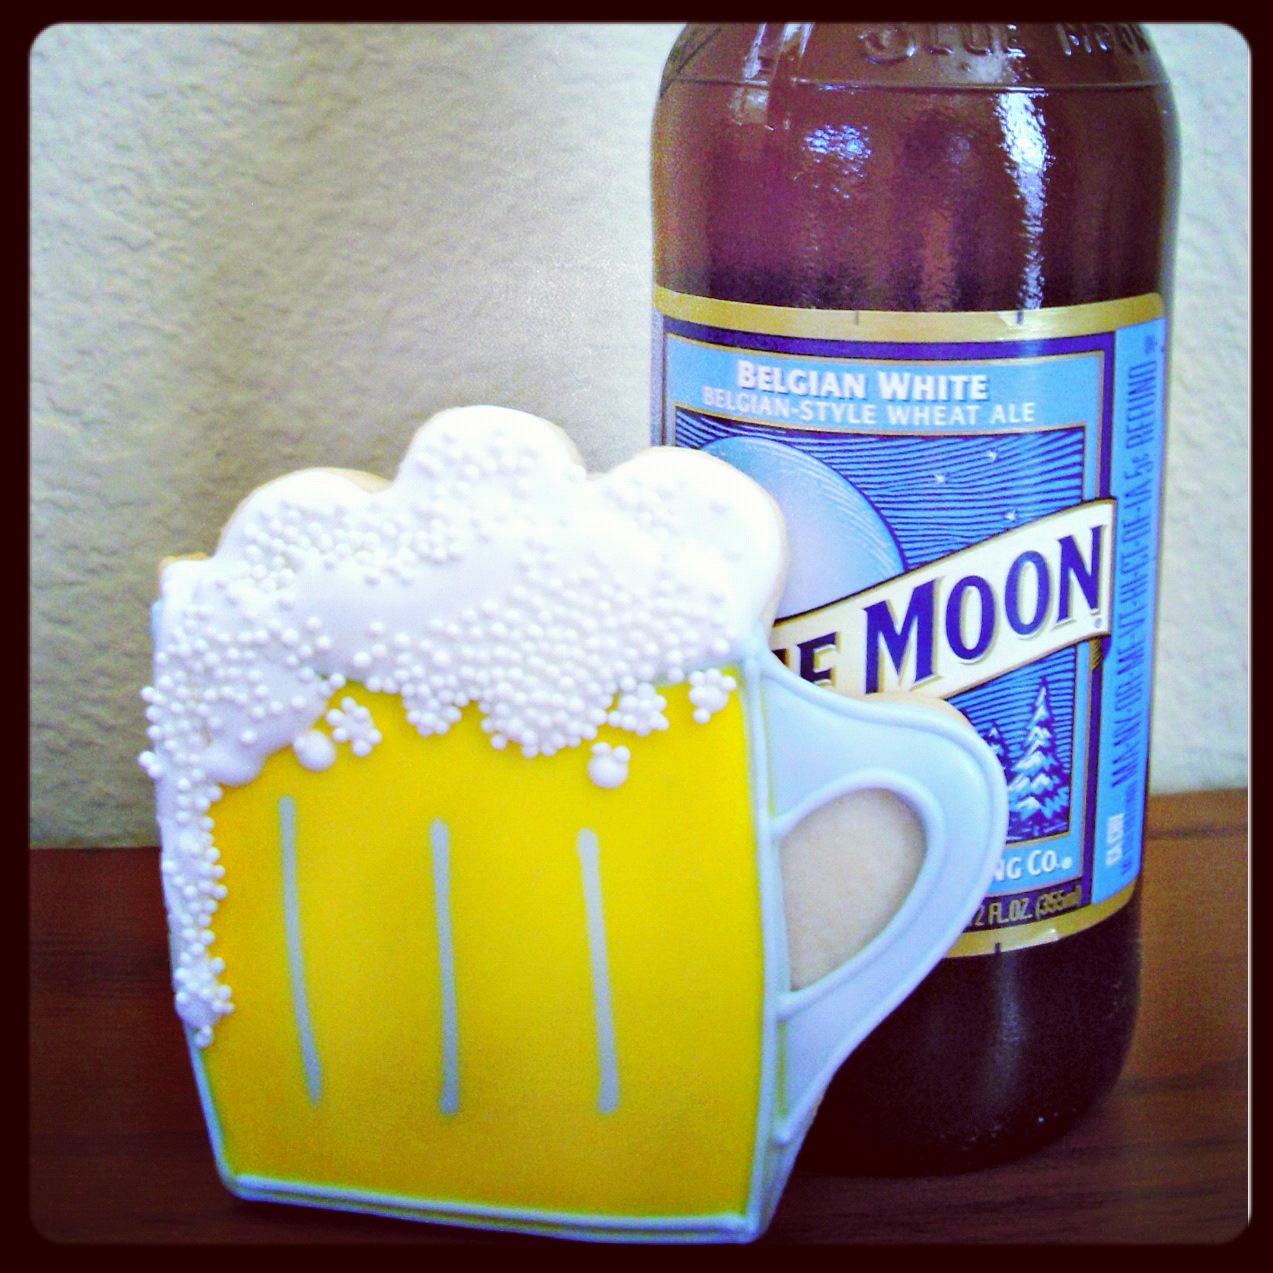
Trinnette, created this frosty mug of beer using her baseball glove cutter! Very clever and a great idea for a 21st birthday platter when you don't have a mug cutter! She really rocked this one and the nonpareils add the perfect bubbly touch!


Christina made this spooky graveyard scene with the baseball glove cutter! The colors really pop here! And it's such a creative use of all the space! If you're still working on Halloween cookies, add some of these into the mix!


Melissa used her baseball glove cutter to make this sweet little bushel of apples! Perfect for fall! I know I'll be adding a few of these to my fall platters now! Such great colors and creative decorating!


Hayley gets credit for the most creative and scary use of the cutter! It's so real, I bought a case of ketchup for my survival kit because the zombie apocalypse is clearly happening and I might as well just surrender now if I have to go without ketchup!


Here are four of the ideas I sketched out, one of us HAD to do a baseball glove right?!?

And a mummy hand, a hot cup of cocoa and a blueberry muffin, for my love muffin ;)

We had so much fun doing this, that we thought it would be fun to invite YOU to join in! And since everything is more FUN when there are PRIZES involved, we thought we'd make it a sweet little competition!

Here's how it works, PLEASE, PLEASE actually read this part before you send any emails with questions or pictures etc.

RULES:
1. ANYONE can participate, no matter what lever of decorator you are. From beginner to pro everyone is welcome! We're all friends and this is just for fun!
2. Use ONLY your own work. DO not submit any pictures that do not belong to you.
3. You can do as many design entries as you like. That's right, no limit! If you have the ideas and the time create away!
4. You must use a baseball glove cutter! You can order the one we used from here.
5. You CAN trim or squish or splice or chop or otherwise alter the cookie cutter if you like.
6. Deadline to enter is Friday, November 23rd!

HOW TO ENTER:
1. Make any cookie design you want using a baseball glove cookie cutter.
2. Email a picture of your design to samantha726@gmail.com. If appropriate, leave a link to your facebook page or blog or your preferred email address so we can contact you!
3. I WILL email you back and let you know I received your work or if I can't open your picture or view it etc.

HOW IT WORKS:
1. Trinette, Christina, Melissa, Hayley and myself will each review the entries and award prizes in these categories,

  • Most Creative/Original
  • Best Technique
  • Judges Choice
2. The winning entries will be posted on FB on December 1st and all winners will be contacted and notified of their prizes.
3. You can post your photos on your facebook page at any time you like, you don't have to wait!

PRIZES:
1. The top entries in each category will receive a gift basket of new cookie cutters, sprinkles and cookie tools valued at over $25.
2. Each of the judges will choose a favorite and each of those winners will receive the next cookie cutter for Creative Cutters: Round Two.

Get creative everyone! I am so excited to see what everyone else comes up with!


Samantha
Flour De Lis

Thursday, September 27, 2012

Easy Pumpkin Bites

These little bites size cookies are the perfect treat! 

Easy to make and so cute! 

These ones here are made on my favorite pumpkin spice cookies, but you can make them on any roll out cookie recipe you like!

They are much quicker to decorate than a normal decorated cookie.

Here is what you'll need,
  • Your favorite cookie dough recipe all baked up into little bite size rounds ( I used one of the smaller ones from the Ateco graduated round cutter set here).
  • Super thick orange and green royal icing
  • Wilton #32 large star tip
  • Wilton #2 small round tip or you could use a large round Wilton #12 if you don't want the ridges. I think they add a nice touch of whimsy ;)


Just whip up a batch of your favorite cookie dough, have you tried this one? Yum!

While your cookies are cooling, mix up your royal icing. You can use your favorite recipe, or try mine here. You won't want to thin your icing much at all, just add a few drops of your desired color and mix it up. I used Americolor orange and leaf green for these. But maybe you want to make violet pumpkin with yellow leaves, you can do that!

If you're having trouble deciding how think your icing should be, take a look at Sugarbelle's tutoriall! She has the best and most helpful tips for perfect royal icing. You can find  lots of great ideas over there  I could read and re-read her entire blog every day!

When your icing is all mixed up, scoop in into your bottles or bags and fit your large tip on first. 

You're going to place the tip in the center of the cookie and squeeze firmly and raise up as you squeeze so the mound of icing gets taller and fatter. If your icing is thick enough if will leave those little ridges which to me make it a pumpkin instead of an orange ;)

You can pipe each one pretty quickly and you'll look back and have 6 dozen before you know it! 
Let the orange pumpkin part set for a few moments before you start the stem and vines and leaves.

It shouldn't take too long to set since the icing is so thick. So grab your green icing and add your small round tip, I used a Wilton #3, but you can use a 1 or 3 if you prefer thinner or thicker vines and stems. 

You probably noticed when you piped the orange out that the icing left a little tip sticking up when you pulled the icing tip away from the icing. I left the little tips sticking up and piped around them to create a stem. Easy peasy!  Just a few twirls of the hand and you'll have a stem, you can use the same tip to create your little tendrils or vines down the side of the pumpkins and you can use a small leaf tip if you want to add those :)


Are you as excited to see fall roll up as I am? This is my most favorite season! I could spend the next hour listing all the things I love about fall, but I'll let you get back to the kitchen so you can whip up a batch of these for your neighbors or co-workers or that sweet friend who helped you move your couch last week and didn't yell "PIVOT" at you ;)

Your friends and co-workers and neighbors will love these cookies and you can be happy they don't take as much work as your other most requested fall favorites! 

Samantha
Flour De Lis

Tuesday, September 4, 2012

S'more Drop Cookies


Today, I am guest posting over at Trilogy Edibles. I shared a super easy and quick treat for an after school snack or for gifting! Pop on over and say hello to Karen! I'll wait here for you, because once you make those treats, I have an uber delicious cookie you can throw it into for pure magic!

This is my favorite and most requested drop cookie recipe. I think everyone has a cookie recipe they are "famous" for, you know the one that everyone in your family and all your co-workers request?

I used to make this recipe all the time and it's super easy to add your own variations. At one point a few years ago, someone mentioned to me that thy put corn starch into their cookies and it make a smoother, creamier textured cookie This one "secret" ingredient made my famous cookies even better!

The recipe is pretty basic, but also pretty perfect!  It doesn't spread and it's not dry or crumbly.  You get a delicious , soft and chewy cookie.


For this post, we're calling these S'mores Drop Cookies.

Ingredients:

1/2 cup granulated sugar
1/2 cup packed brown sugar
3/4 cup unsalted butter, cold
1 large egg
2 tsp vanilla
2 1/4 cups all purpose flour
2 tsp cornstarch
1 tsp baking soda
1/2 tsp salt
1 1/2 cups s'mores snack mix

Directions:

1. Preheat oven to 350 degrees.
2. Cut cold butter into cubes and add to mixer with both sugars.
3. Cream butter and sugar until smooth and fluffy.
4. Add egg and vanilla and blend well.
5. Add flour, corn starch, baking soda, salt and blend.
6. Add in s'mores snack mix and stir just until incorporated.
7. I like to use a 1 TBSP cookie scoop for medium sized cookies. You can use a larger one, but adjust your baking time and temperature.
8. Bake cookies for 9-10 minutes, remove from oven and cool.


Just look at those bits of melted marshmallow and cinnamon and chocolate chip goodness! Oh and those chewy and crispy chunks of graham cereal. Yum!
Make these as soon as possible if you want to experience delicious cookie perfection!


Samantha
Flour De Lis

Monday, August 27, 2012

Play with Your Food!

You may have noticed the cookie world has been a buzz with some teasers for a fun project! And total you get to see all of the amazing work these ladies created!! I myself am blown away!


A truly wonderful collection of amazing work from some really talented cookie artist!

Take a look for yourself!


1. Crossword Puzzle by Natalie, Palestine Painted Cookie
2. Poker Set, by Debbie, Mt. Lookout Sweets
3. Cootie, by Kookie Kreations by Kim

1. Paper Dolls by, Elizabeth, Arty Mcgoo


1. Scrabble by, Anne, Flour Box Bakery
2. Candyland by, Nicole, Life's a Batch
3. Pin the Tail on the Donkey by Vicki, Sweet Tweets


1. Words with Friends by, Hillary, The Cookie Countess
2. Ms. Pacman by, MeFlour De Lis
3. Hungry Hungry Hippos by, Andrea, Cupookie

1. Twister by, Jill FCS
2. Dominos by, Jeannette, Sweet Dough
3. Wooly Willy by, Angela, Oh Sugar Events


1. Vintage Fisher Price Toys by, Callye, Sweet Sugarbelle
3. Marbles, Jacks, Horseshoes and Pick-up-Sticks by, Anita, Sweet Hope Cookies

I hope you enjoy looking at all off these wonderful and nostalgic toys as much as we enjoyed creating them! There is always an element of fun when you get to recreate a part of your childhood and then eat it ;) 


Samantha
Flour De Lis

Wednesday, May 30, 2012

Coconut Cream Cut Out Cookies

Coconut is one of my favorite things! It's so good! Fresh from the shell, shaped like Santa and covered in chocolate, baked into a pie, rolled into a cookie, you name it, I like it!

I decided a few months ago I was going to make coconut roll out cookies. I wasn't convinced that I had found the right version until I made them for my sister on Easter.  She raved about them and has been calling and texting me daily asking for more.

She's kind of a big deal, in my cookie world, so I trust her opinions ;)

She's cute and she likes cookies. I mean she has tried every single cookie I've ever made in the last 15 years! Good enough for me!


If you've tried my Citrus Vanilla Bean Cut Out Cookies, you'll recognize the base for this recipe. All of my cookies start with the same basic ingredients and measurements.

We're going to start some pretty delicious things :)
The first time I tried the recipe I used regular sweetened flaked coconut. You can buy it at any grocery store in the baking isle. The problem with flaked coconut is that the flakes are really long and they torn up my dough when I cut into it. Not pretty! But the flavor was great!

The next time I tried it I was going to use desiccated coconut. It's very fine, tiny little flakes of unsweetened coconut. Luckily a much wiser cookie friend had already taken that route and informed me it was dry and flavorless in cookies. Not what I wanted.
She suggested I try toasting the coconut first and then adding it to the recipe. It worked great, no torn up cookie edges! But it completely changes the flavor of the cookie. Not in a bad way, still incredible delicious. Just toasted. It adds a different texture as well.

If you stop over in the baking aisle of your favorite store, you'll probably find a few different kinds of coconut. Two I can almost guarantee you'll see are "Sweetened Flaked" and "Sweetened Shredded".
The shredded coconut is cut a little finer than the flaked variety and for this recipe it's my go to coconut!

In addition to changing up my coconut in this recipe, I also used a different fat. I am usually a 100% butter kinda gal. I like it organic and I like it unsalted. There are few things as wonderful as pure, fresh butter.

Coconut oil might be one of those things :)
As soon as you break the seal and catch a scent, you'll understand.

I like to gather everything up and measure it out before I start mixing, that way I don't forget an ingredient or add too much of one.


I start my cutting the butter into smaller pieces to allow it to break down faster. Toss the butter cubes, coconut oil and sugar into your mixer bowl and start it up. Cream together on medium low.


You want the butter, coconut oil and sugar to be very well mixed, no large chunks of any one ingredient should be visible.


Once creamed, scrape the butter and sugar mixture off the sides and back into the bowl before adding the egg and coconut emulsion.
Turn mixer back on to medium and blend until smooth and fluffy.

Grab your pre-measured bowl of dry ingredients (flour, salt and baking powder) and dump it into the bowl.

  • Mix just until mixture forms large crumbs, similar to piecrust. 


Once you get here, stop mixing and add your shredded coconut. If you do it at this stage it still gets incorporated into the dough but doesn't get over mixed.

Once the coconut is added turn the mixer back on medium low and continue to beat until everything is well mixed and the dough starts to come away from the bowl and form a ball around the beater.

Now scoop your dough out of the mixer bowl and roll out onto a lightly floured surface. I like to roll mine out on wax or parchment paper to save cleanup.


Can you see all the little flecks of coconut? Aren't they exciting?! I love coconut :) I may have already told you that...

Once you have the dough rolled to your desired thickness, I usually go with about 1/3 of an inch. They bake up a little thicker leaving me a thick, soft, moist cookie. Mmmmmm my favorite!

Grab up any cutters you plan to use and start cutting into the dough.


Even with the shredded coconut, the little pieces of coconut will still get pulled out of the dough when you cut through. Leaving you with some jagged edges and rough tops. This is nothing compared to the first time I did it with flaked coconut!

They'll still look fine after they bake, and won't be any problem at all if you plan to decorate them.

Take your cut out shapes and place them onto a baking sheet, give them plenty of room as they expand when baking and you don't want them to touch.

Pull them out of the oven when the bottoms are very slightly golden and any little pieces of coconut sticking out look toasted.


These cookies are heavenly straight out of the oven. They are so creamy and moist and packed full of coconut flavor.

Here is the recipe:

Coconut Cream Cut Out Cookies:
Recipe by me :)

Ingredients:
3 cups all purpose flour
1/2 cup butter
1/2 cup coconut oil (if you don't have coconut oil you can use all butter, or if you prefer coconut oil you can leave the butter out.
1 cup granulated sugar
1 egg
1 tsp coconut emulsion or extract (I prefer LorAnn's Bakery Emulsions)
1 cup sweetened shredded coconut (try toasting it first if you want to change up the flavor and texture of the cookie)
2 tsp baking powder
1/4 tsp salt.

Directions:
1. Preheat oven to 350 degrees.
2. Cream butter, coconut oil and sugar until smooth and well blended.
3. Add egg and extract and beat until fluffy.
4. In separate bowl combine flour, salt and baking powder and mix together.
5. Add dry ingredients to wet ingredients in mixer bowl and beat for 30 seconds to a minute until it resembles crumbly pie crust starter.
6. Add coconut and continue to mix until dough forms.
7. Roll out dough on lightly floured surface and cut into desired shapes.
8. Bake for 9-11 minutes until lightly golden on bottoms.
9. Remove from oven and let cookies cool slightly before eating and completely before decorating.

I like them fresh and hot without any decorations. It's like a soft, sweet little bite of coconut shortbread and it melts in your mouth.
But of course, if you are making them for your super cool little sister, you'll want to let them cool and add on some decorations.

I used my Royal Icing recipe to decorate the cookies above, and you can follow the instructions and make some too!

And now the moment you've been waiting for! I mean we're technically all winners when we make these cookies, but one lucky reader has been drawn to win a bunch of prizes from my RI post!

And the winner is....

Congratulations Nicole! You have 48 hours to contact me and I'll get your prizes in the mail! If I don't hear from the winner, I'll draw a new one on Saturday!

For the rest of my wonderful readers, thank you so much for sticking with me! Try this recipe and make some royal icing to go with it!

I'll back soon with another post and there will be plenty more prizes to come!

Samantha
Flour De Lis